- Details
- Written by Super User
- Category: Sourdough
- Hits: 561
Sourdough Bread
Note to reader - more illustrations to come
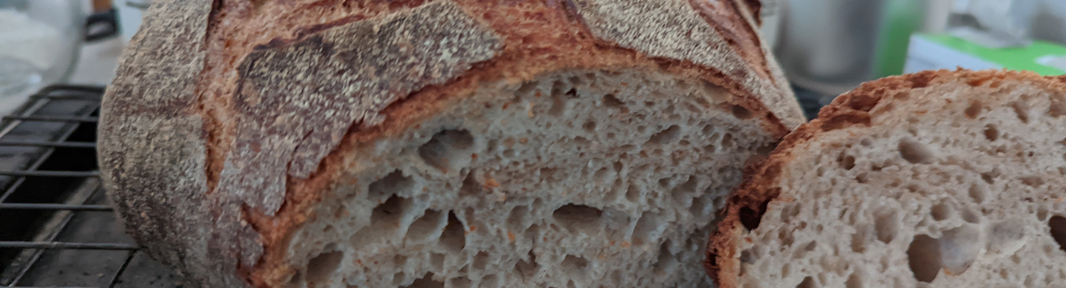
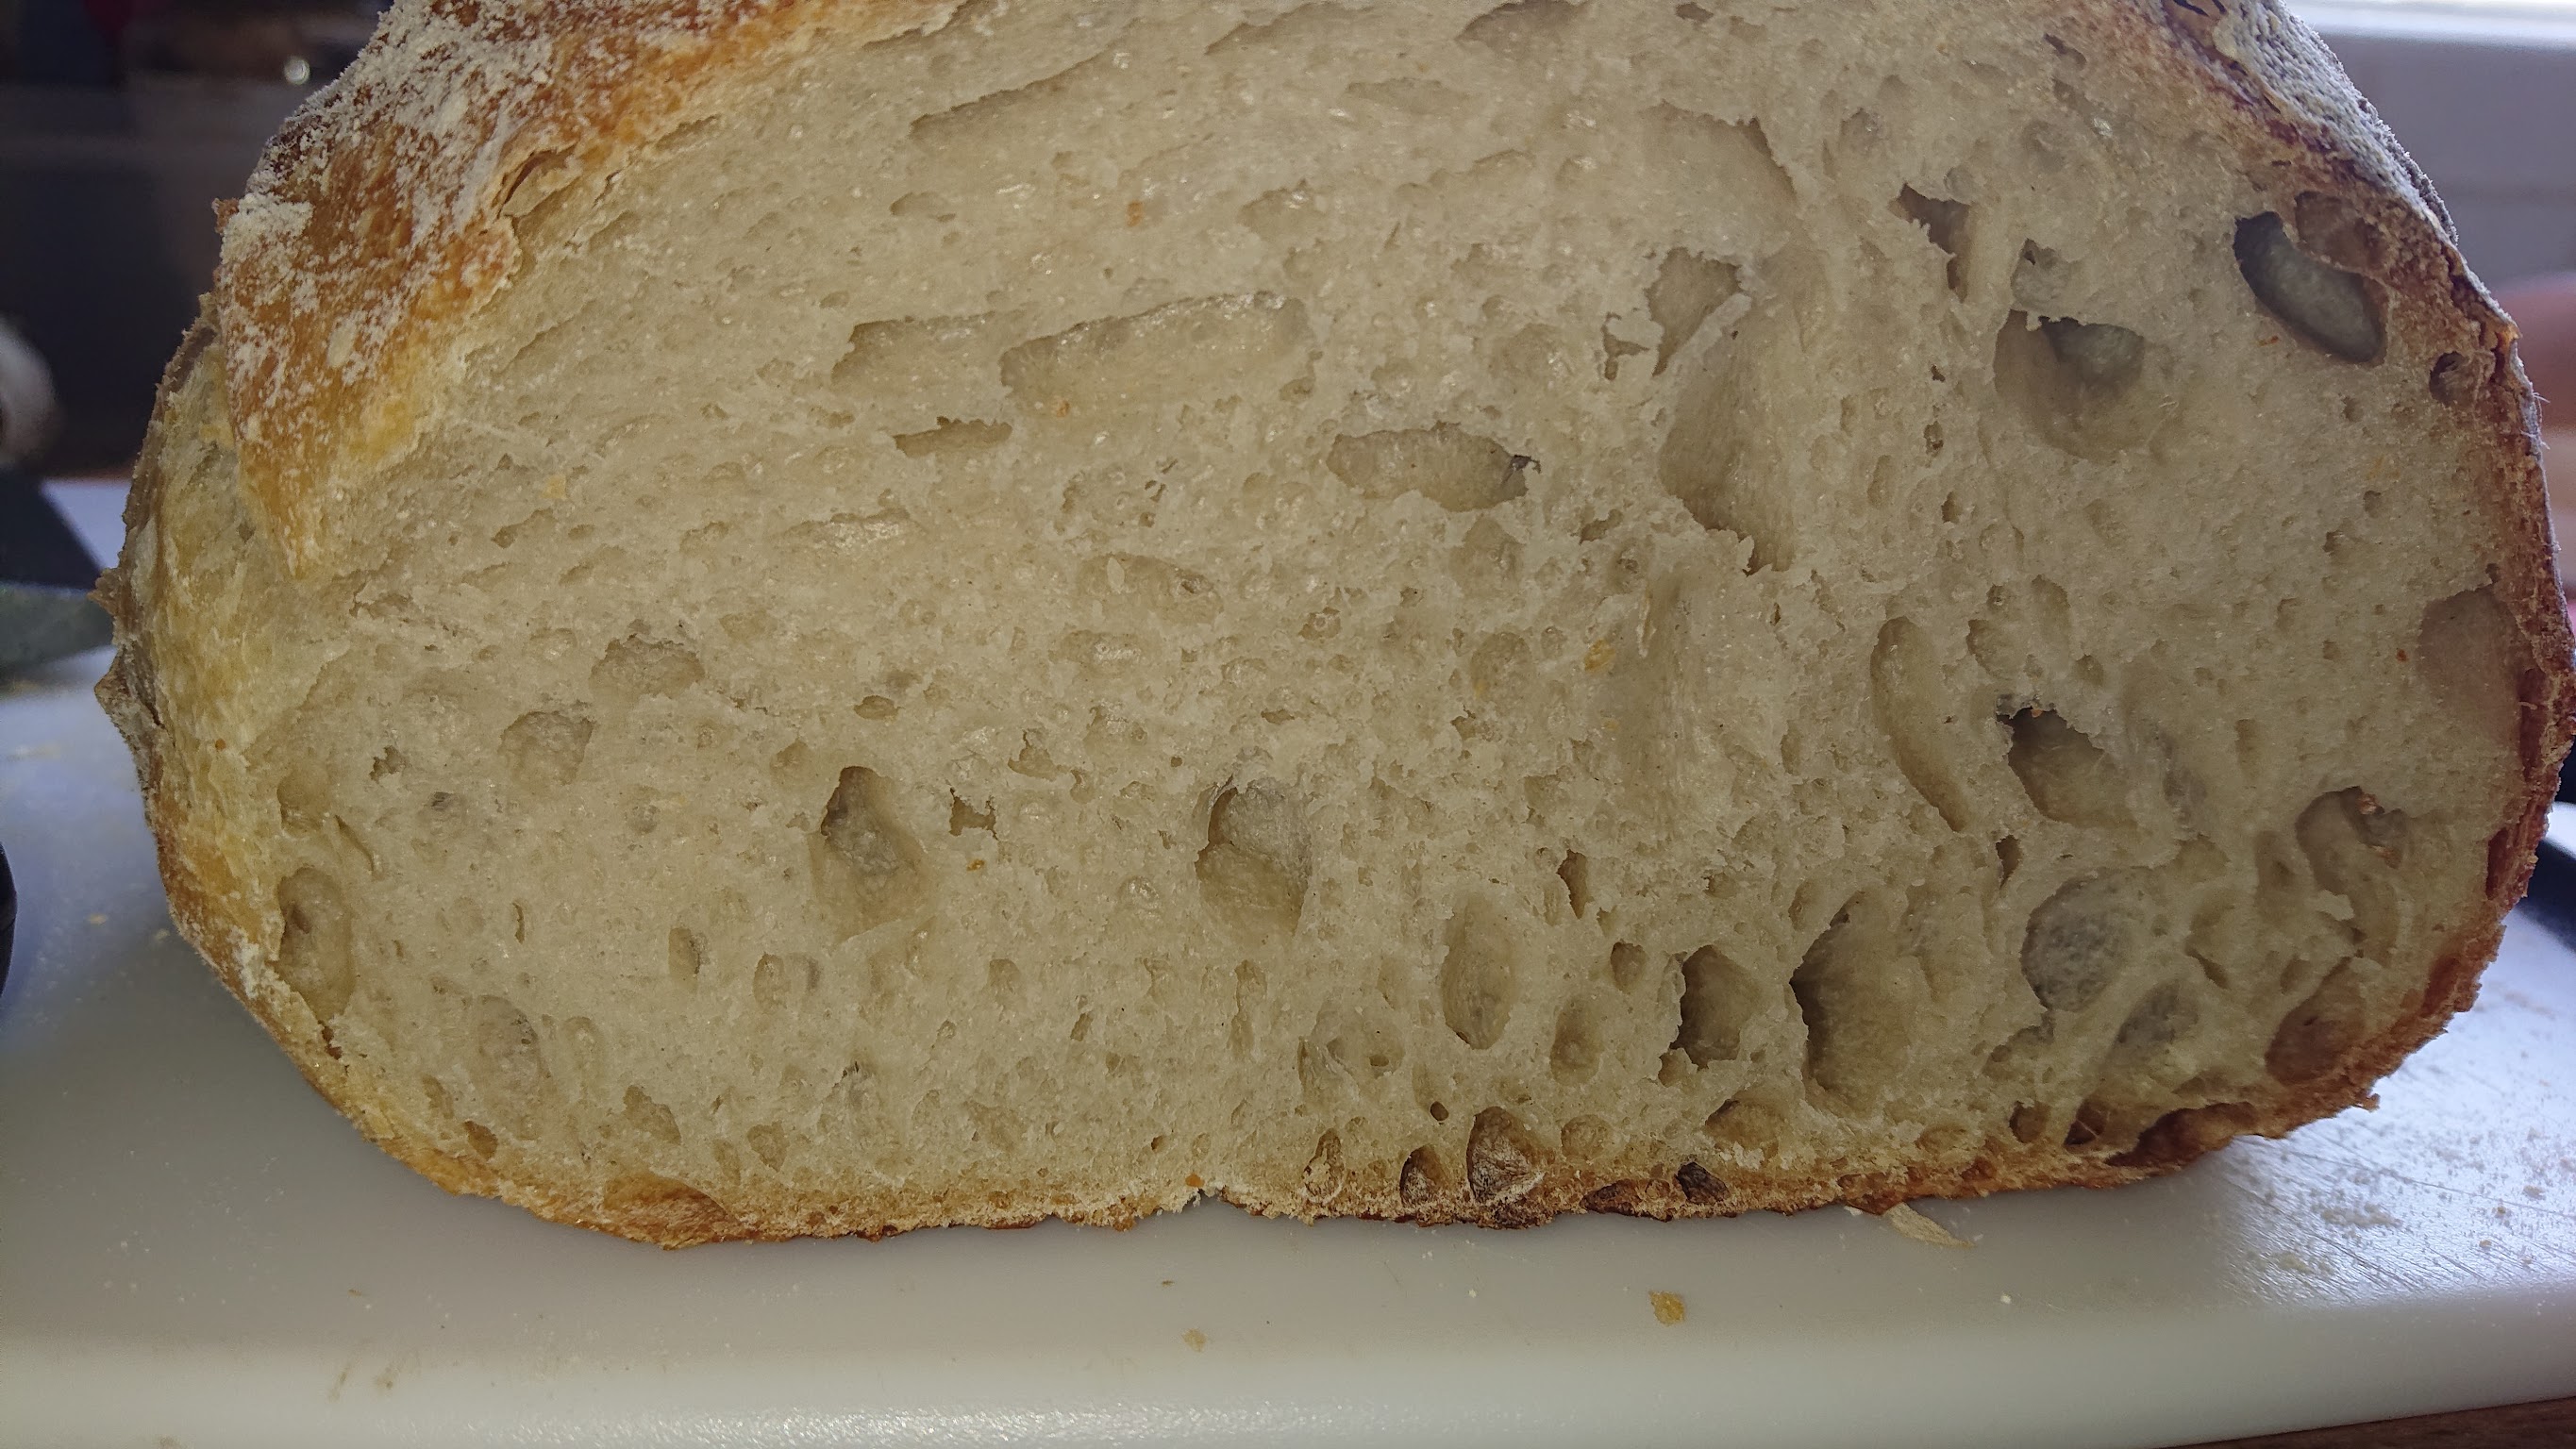
I describe here my method of making a very good sourdough loaf. The recipe as-is is very reliable and creates a lovely loaf, with a slightly sour edge and a very crisp crust.
Perfect for toast with just butter or some home made jam.
Starter
Creating a starter is easy.
to get started you will need to 50g of freshly ground flour, and 50g freshly drawn water, and a good jar with lid (I use a 250ml Kilner jar). (If your water is heavily chlorinated or flourinated it may be better to let it stand an hour to let the gas dissipate as it can sometimes it is said cause problems with the starter)
Weigh flour and water into the jar. Stir vigorously and close the lid.
Leave for a day. Empty out all but a teaspoon of the liquid, and again weigh in the flour and water. Again leave for 24hrs.
Leave for a day. Empty out all but a teaspoon of the liquid, and again weigh in the flour and water. Again leave for 24hrs.
Leave for a day. Empty out all but a teaspoon of the liquid, and again weigh in the flour and water. Again leave for 24hrs.
By now you should start to see the liquid frothing and bubbling.
Now feed the starter until you are ready to use it.
For my recipe below you will need at least 160g of starter. So for a 100% hydrated starter you will need 40g plain flour, 40g wholemeal flour and 80g water.
We are aiming for 1100g of dough and a 65% hydration.
Plain strong bread flour 500g
Water 365g
We will autolyse these for an hour. This will give gluten a head start.
Once autolysed a quick window pane test will show a good degree of gluten development already with no kneading.
Now add the rest of the ingredients
Salt 10g
Wholemeal or Rye flour 100g
Starter 160g
I now use my stand mixer with a dough hook for just a couple of minutes to bring it together - you can use your hand.
Now leave the dough to rest in the mixing bowl for an hour.
Once rested every 30mins perform a stretch and fold. Usually only a couple or three of these are needed. Using the window test you will see the progress of gluten development.
When you have sufficient gluten development and the dough is now looking and feeling silky smooth although slightly sticky as it is a 65% hydration dough. Leave the dough to rise for at least an hour until the dough has risen at least 25%. You want the dough to still have some life left in it so it will continue to rise when in the final proofing stage and when it goes in the oven. The poke test will let you judge that.
Shaping
Shaping is a very important part of the gluten development process and the key to getting oven bounce and a nice shaped loaf. Once the bread has rise tip out onto a dry bench and do an initial shape. Leave to rest under a tea towel for 10-15mins, and check to see if it has fallen.
Reshape, and rest.
Carry on until the bread holds it's shape well. Now place in a banneton for the final rise.
Carefully, using your bench scraper lift the dough into a well floured (using rice flour ensures not too much flour ends up on the dough). Tip upside down so the nice round smoot side of the dough is down towards the banneton. On the "rough side" of the dough, now facing up, you want to create further tension in the loaf by pulling the outside of the loaf in starting at opposite sides, then rotate 90 degress and again and then rotate 45 degress and pull in again. This should now give you a nice tight dough that has plenty of tension in it and is pulling away from the banneton around the top.
Leave to rest and rise until it is curving upwards. Again you want the dough to still have some life in it so don't over rise the dough.
Baking
Get the oven hot - 260C is good - but as hot as it will go. Place a dutch oven (or a cast iron le creuset casserole pot) into the oven to get hot too. I normally leave the oven on with the pot inside the oven for an hour so everything is good and hot.
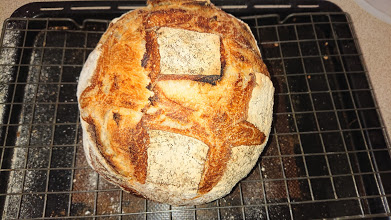
Now tip the dough carefully into the pot as centrally as possible. Mark the dough with your lame in a pattern that will allow the bread to rise and form a nice pattern.
Carefully place the paper and dough into the dutch oven - careful as everything is hotter than hades.
Put the lid on and back into the oven for 25mins.
After 25mins, take the lid off (sneak a look and the bread should have risen to the top of the pot). Now turn down the oven to 230C and put the bread in the pot with the lid off back in the oven for another 25mins during which time it will now form the crust.
Once the time is up turn the bread out onto a cooling rack and leave to cool as long as you can before having your first slice.
Once the bread has cooled cut yourself a slice and slather with good butter and possibly some home made jam. Enjoy.
Recommendations
Flour - Shipton Mill White Bread Flour - easy to buy a 16kg sack to last you a couple of months.
- Details
- Written by Super User
- Category: Recipes
- Hits: 626
Pork Pies

There is nothing more satisfying than eating your own pork pie with a golden crisp crust and good quality well seasoned pork.
Try this and experience.
You will need a pie dolly to get the authentic product but a jam jar covered in oiled cling film can also be used.
- Details
- Written by Super User
- Category: Sausages
- Hits: 313
Making Sausages
Process
- Meat - Buy good pork shoulder. Pork should naturally comes with the perfect fat to meat ratio and is naturally 20% fat. Initially when you buy the pork place in the fridge for at least a day to get it cold.
- Seasonings - it is usually best to use dried herbs for the seasonings as there is potential with fresh herbs of bringing in unwanted "things" into the mix.
- Salt - salt is important as it provides the taste as well as the preservation needed. Salt needs to be mixed in at 18g per kilo of meat.
Preparing the meat
Take the chilled meat from the fridge.
Remove the skin and keep to one side in the fridge to make scratchings with later on.
Cut the meat into pieces that easily fit into your grinder/mincer. If you use the Inox No 8 below it will process 2x4cm pieces very rapidly.
Process the meat and place the processed meat back into the fridge to cool down again.
Season the meat.
Add the salt and chosen seasonings for your sausage. There are many recipes online but a good place to start is the Weschenfalder site.
For a couple of kilo of meat mix add about 100ml of water, wine or cider to preference. This idea is to use this for acidity and to get a good mix constituency for stuffing the sausage.
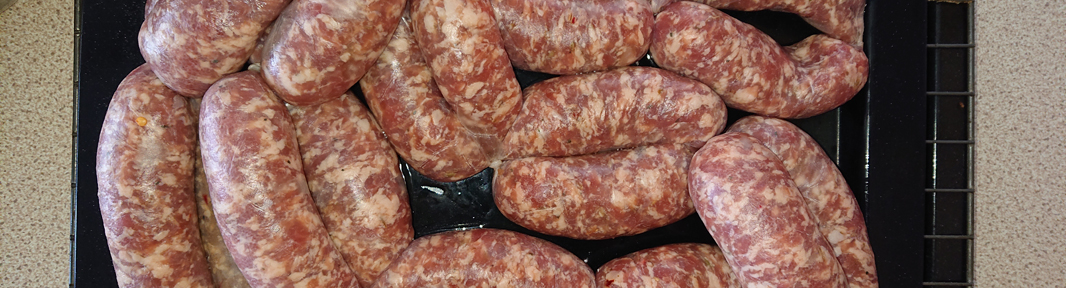
Stuff the sausage
Stuff the sausage
Link the sausage
Leave to dry
Equipment
Supplier Weschenfelder
- Mincer/Grinder Inox No8 Stainless Steel
- Stuffer Trespade Minnie-plus Little Demon Rosso
- Skins Home pack hog casings
- Details
- Written by Super User
- Category: Recipes
- Hits: 564
Marmalade
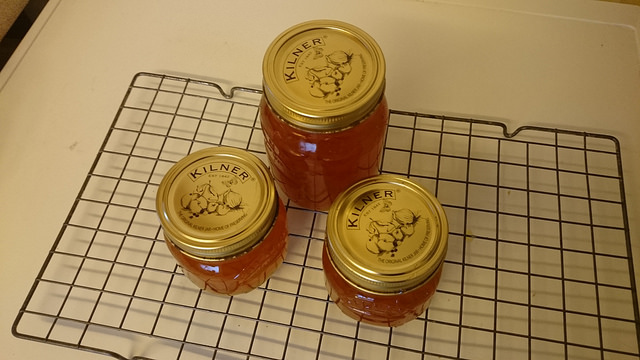
This recipe from the BBC is for the whole fruit method. I have chosen this as it seems to give the best setting of the options.
I have added my own notes to the BBC recipe based on some (limited) experience of creating this delicious seasonal product.